
With Christmas time approaching, I decided that with the help of the Fab Lab’s Ultimakers, this year’s Christmas cookies ought to be made in my own shapes, not just the same boring bought ones as every year.
Not a very original idea in itself – the web is full of models for 3D-printed cookie cutters, and there is even software like Cookie Caster or CookieCutter-Editor that helps you design your own. However, I wasn’t quite satisfied with what they generate: very simple, angular shapes with a blade of constant thickness and a flat end that I can’t imagine to cut through dough very well, and a wide, thin square rim at the base. What I had in mind was more like this Christmas tree: a blade that tapers to a minimum thickness at the top so that it actually cuts, and a rounded rim that looks presentable and is comfortable to touch, on the outside only so it doesn’t get in the way of the cookie.
So I set out to achieve this, ideally using only open-source software. Having used Blender before, I started with that. The basic task is to take a given shape (profile) of the cross section of the cookie cutter (defining the tapered blade and rim) and sweep it perpendicularly along the circumference of the cookie to extrude the surface of a solid. This is functionality that exists in Blender and probably every other 3D modeller. However, it turns out that it doesn’t work very well for this purpose except on the most basic shapes: Where the cookie shape has acute-angled inward corners or curvature radii smaller than the width of the cross section, the extruded surface self-intersects, which makes it unsuitable for 3D printing. After several other failed attempts at getting rid of those by various ways of offsetting curves, I settled on the following workflow that was able to handle even complicated shapes, albeit with a fair bit of manual work:
The Inkscape and Blender Method
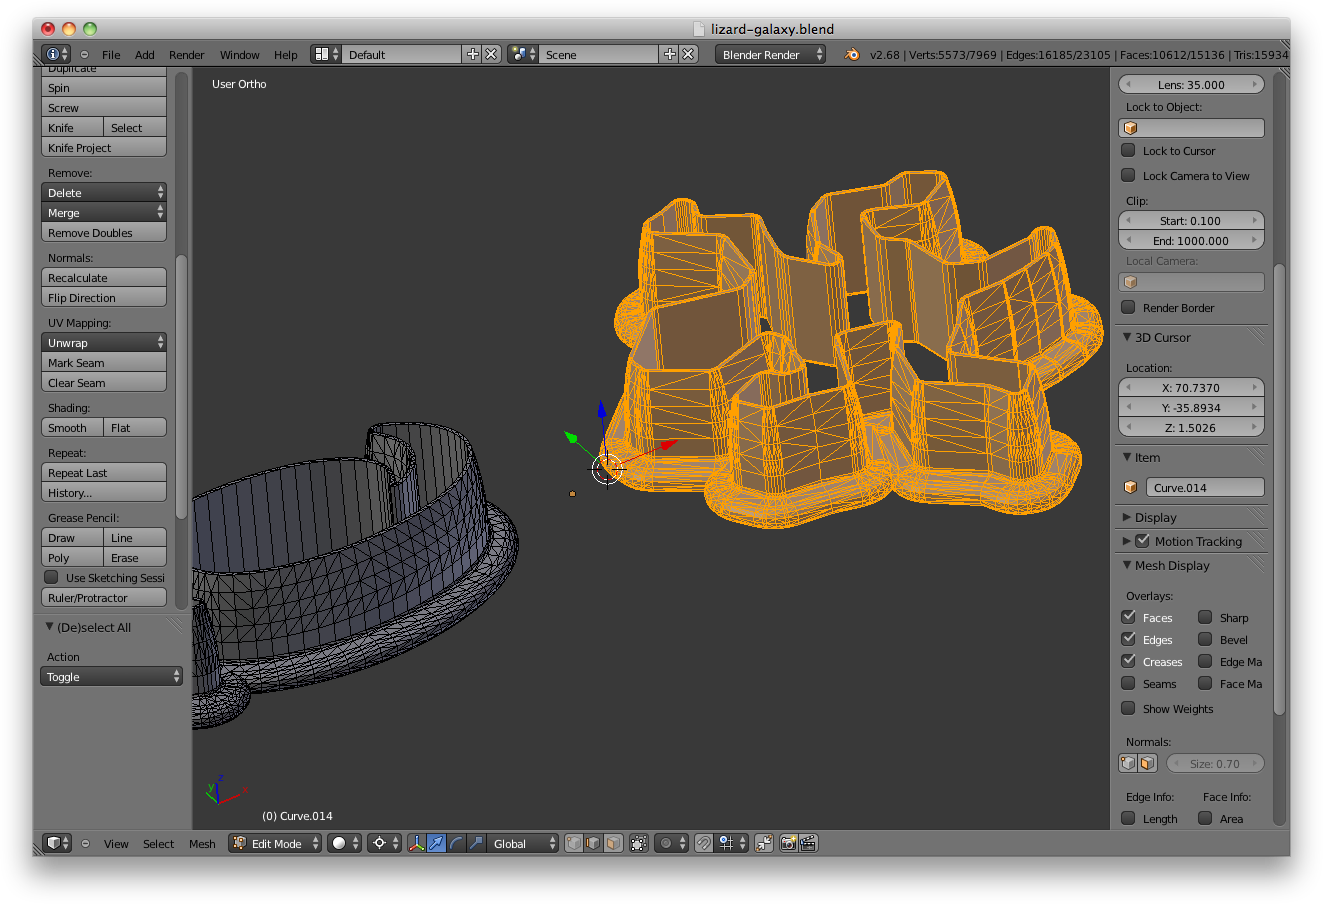
In Inkscape, draw a polygonal cookie cutter cross section, and the shape of the cookie as a Bézier path. Use the “linked offset” feature to create expanded versions of the cookie shape, one for every vertex of the cross section, offset to the horizontal coordinate of the vertex (exact offsets in mm can be entered in the XML editor). Convert all these curves to paths, then polygonize them using Extensions > Modify Path > Flatten Beziers with a flatness of about 0.1. Save as SVG and import this into Blender, convert the curves to meshes, and join them into the same mesh. Scale by 1000 to get units of millimeters (default appears to be meters). Take each one of the contours and lift it to the correct height according to the vertical coordinate of the corresponding vertex of the cross section. If you imported the cross section as well, this is easily achieved by joining it to the same mesh object as the contours, placing it somewhere convenient in the correct orientation, snapping the 3D cursor to one of its vertices, and scaling the corresponding contour to zero in Z direction around the 3D cursor. Remove doubles to make sure everything is connected where it should be. Then select each pair of adjacent contours and fill the area between them with faces. For vertical surface parts, “extrude” works better than “fill”. Filling can fail if among the already created faces there are triangles that have two adjacent edges on the contour, in that case you may need to create individual faces manually around these points and only use automatic fill for the remaining pieces of the edge loop. Finally, you may need to flip some edges near narrow corners to make the surface look better.
Example Inkscape and Blender files for a testing shape specifically designed to have difficult curves and corners are attached.
While this approach worked and produced pretty good results, it still required a considerable amount of manual work. This is why, in parallel, I also developed a second, completely different method:
The Fully Automated Discrete Method
This algorithm works in a discrete, voxel-based way and can handle even the most difficult shapes completely automatically. It takes the cross section shape and the cookie shape as pixel images, where black indicates inside and white or transparent indicates outside, antialiasing recommended for higher accuracy.
Briefly, the algorithm works as follows: For both shapes, it computes the 2D distance field on the pixel grid: how far away from the shape every point is, positive on the outside, negative on the inside. These two 2D fields are then used to compute the 3D distance field of the final cookie cutter on a cubic voxel grid: for point (x, y, z), look up the shape distance d at (x, y), then look up the cross-section distance at (d, z) (linearly interpolated in d). Finally, a mesh of the zero isosurface of this 3D field is generated using published algorithms.
An implementation of this algorithm in C++ is available at https://github.com/cwalther/cookie-cutter-sweeper. Binaries for Mac OS and Windows as well as some example files are attached below. It is a command-line program with only a rudimentary user interface, run with no arguments to get a usage description.
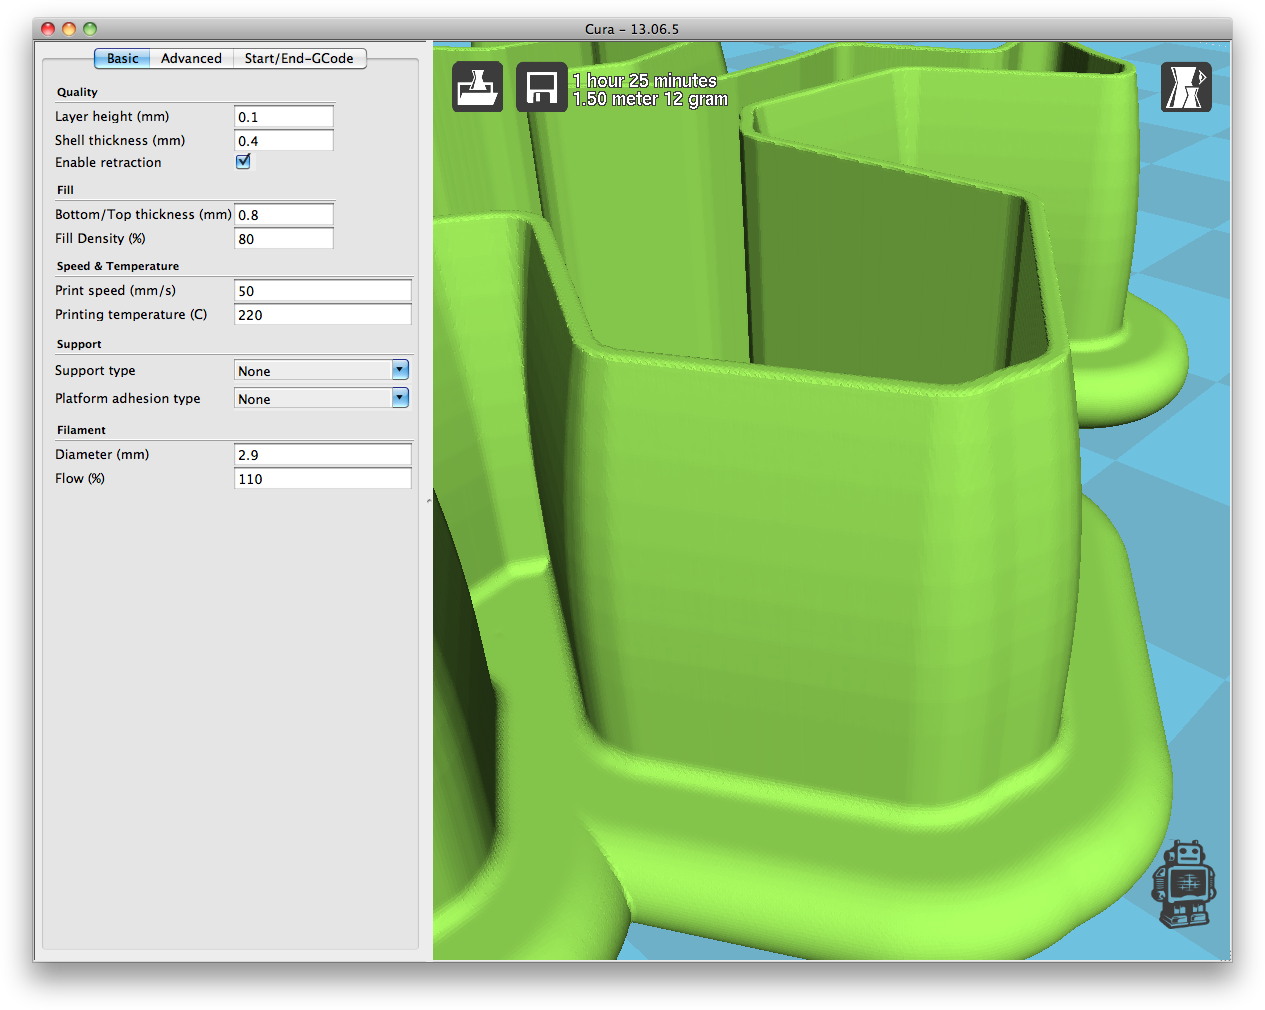
The STL files produced by this get quite large (> 100 MB), because they have a constant level of detail all over the surface (faces of a size corresponding to one pixel in the input images), even in large flat areas that would not need so much detail. Cura seems to deal with them pretty well though.
Results
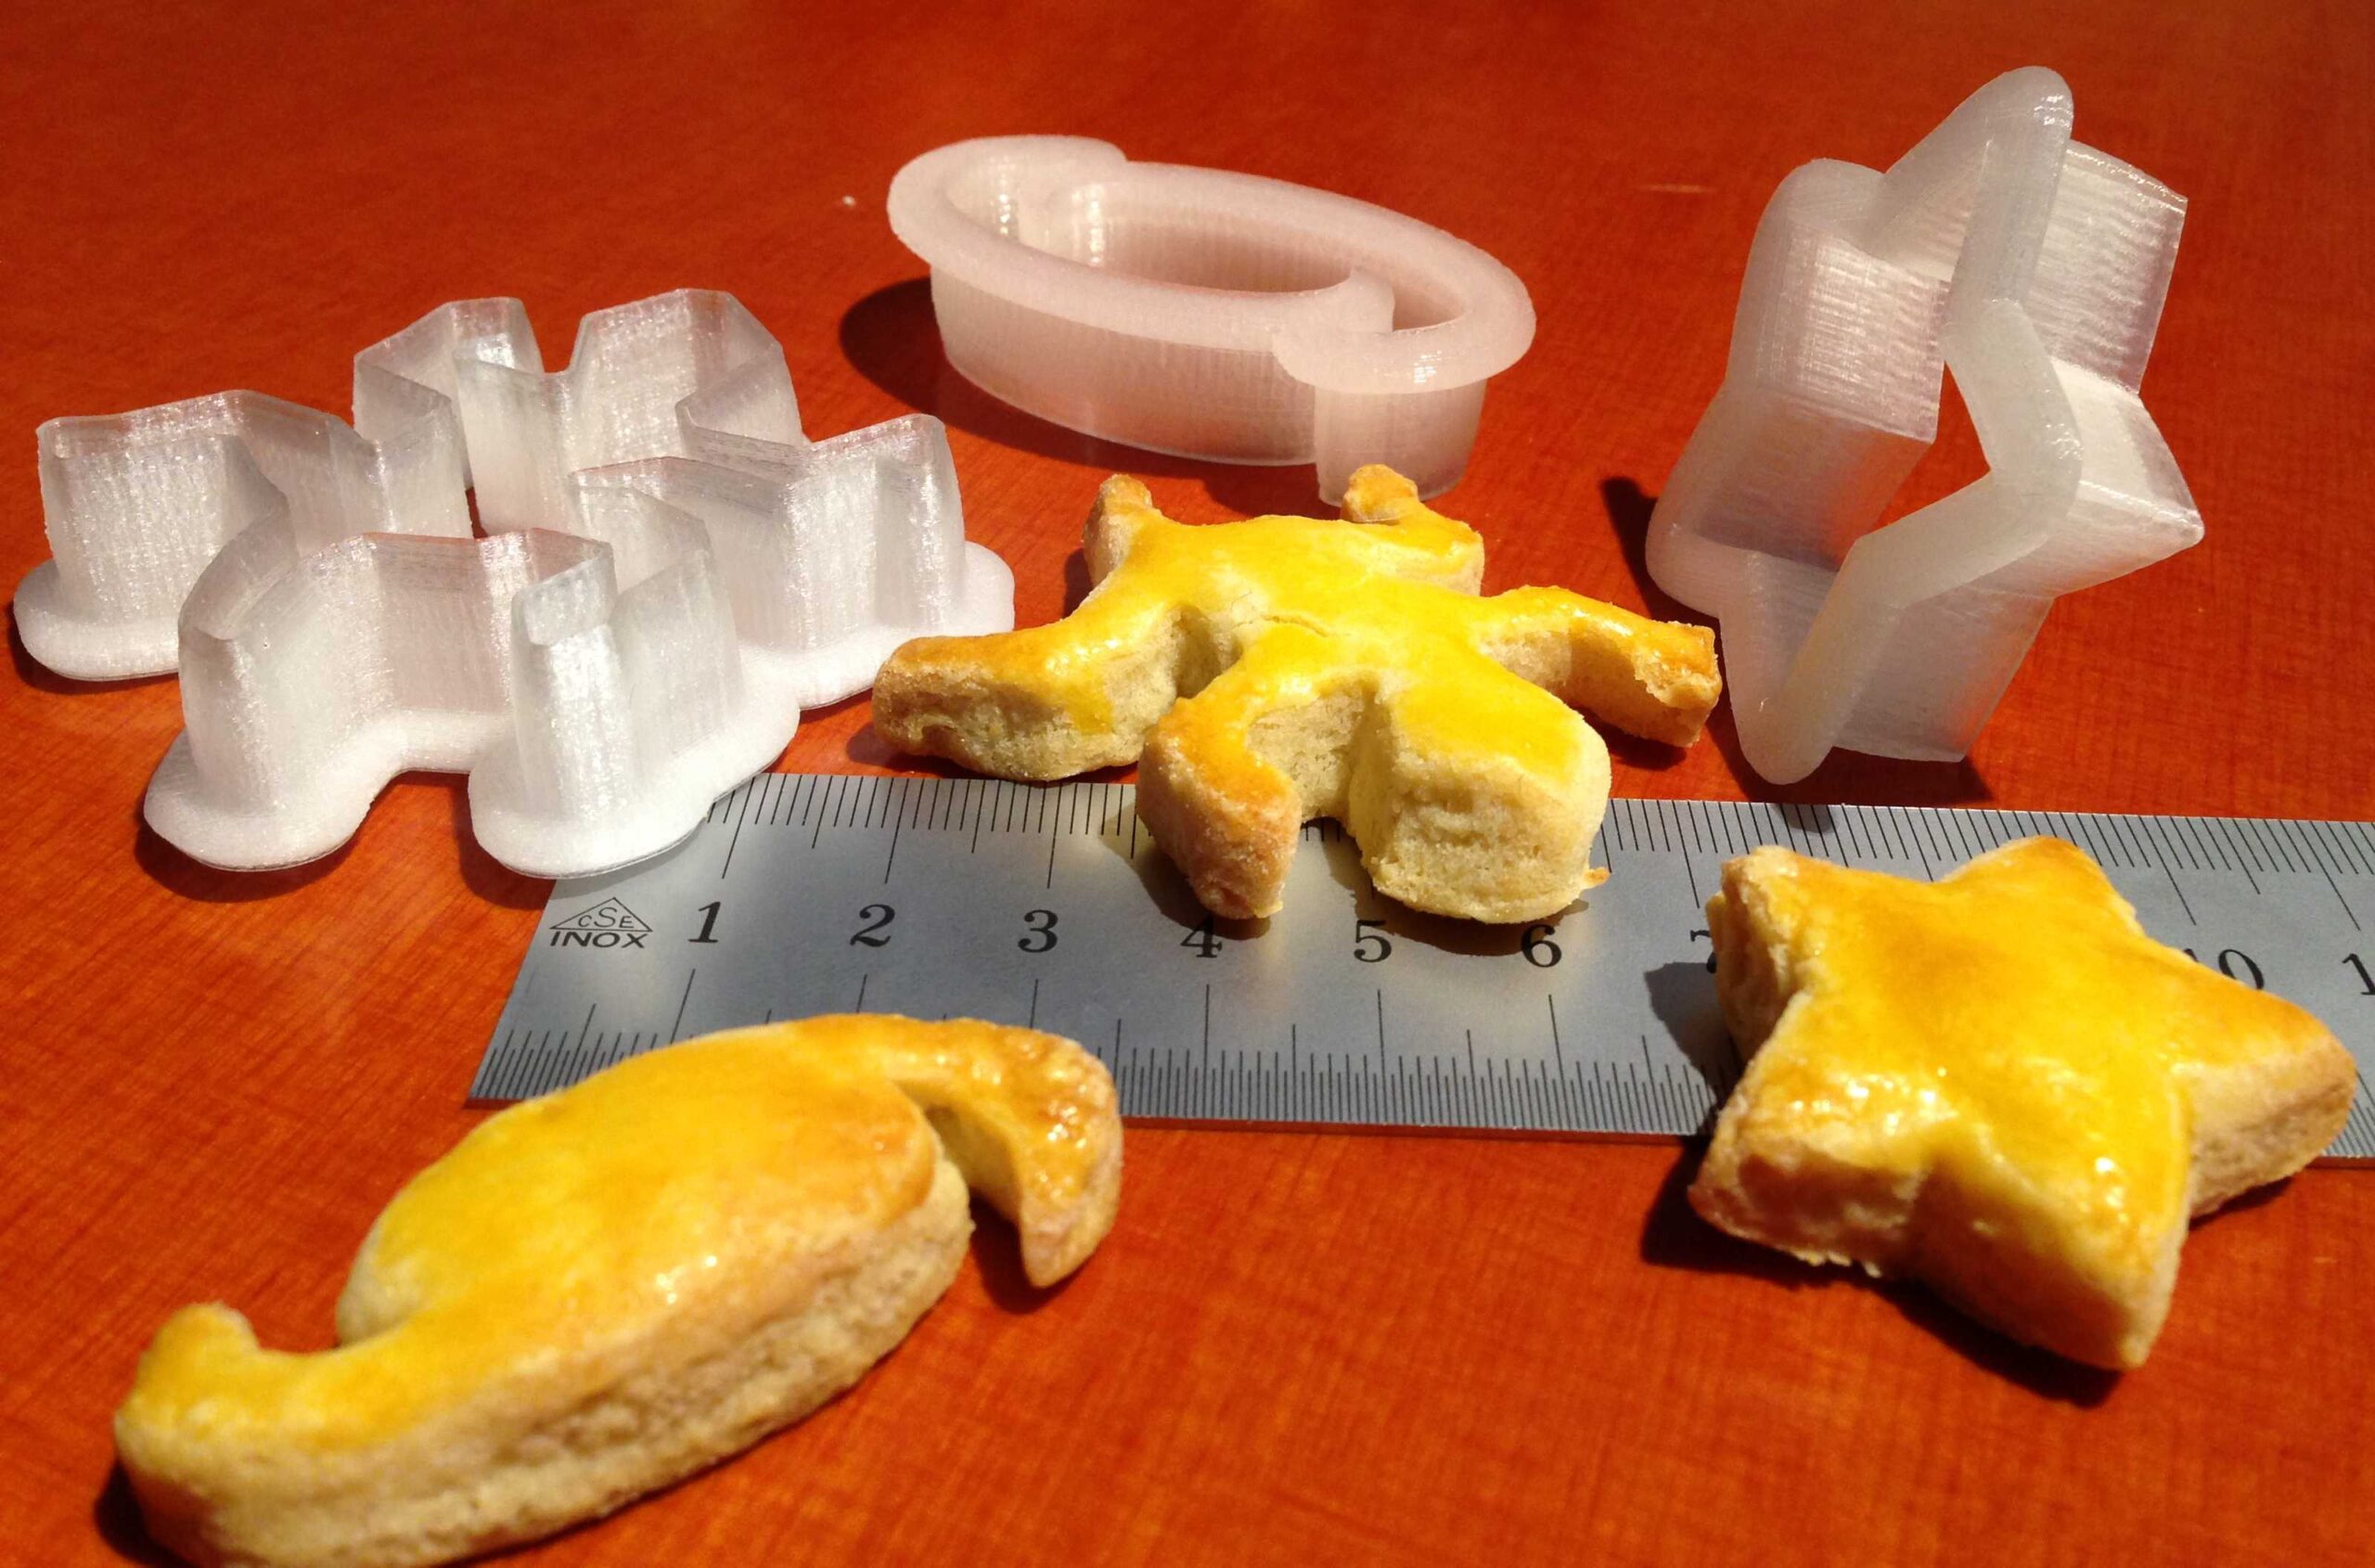
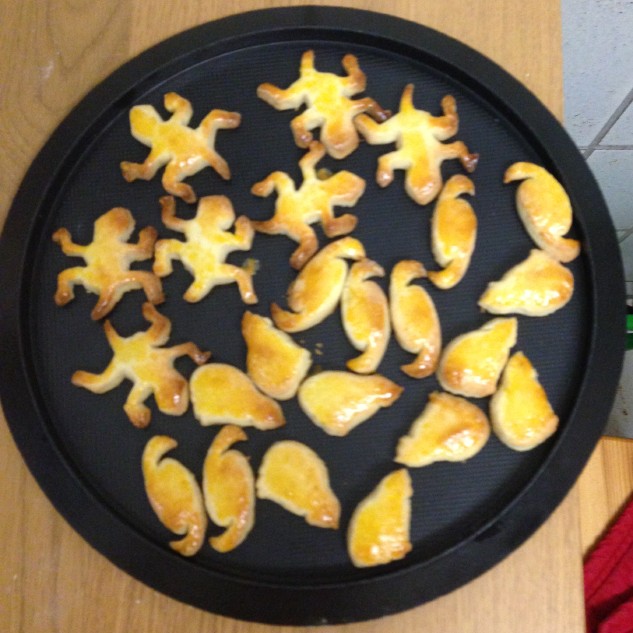
For small cookies of a diameter around 4 cm, a cross section with the following parameters proved to provide sufficient stability: Height 15 mm; blade thickness 1.6 mm, tapering to 0.5 mm; rim 3 mm high and 5 mm wide. For larger cookies, this probably needs to be scaled up. Print in PLA at 80% fill and with a shell thickness of one round (0.4 mm) instead of the usual two, as two caused visible stair-steps where the blade gets very thin.
Insights from the First Bake:
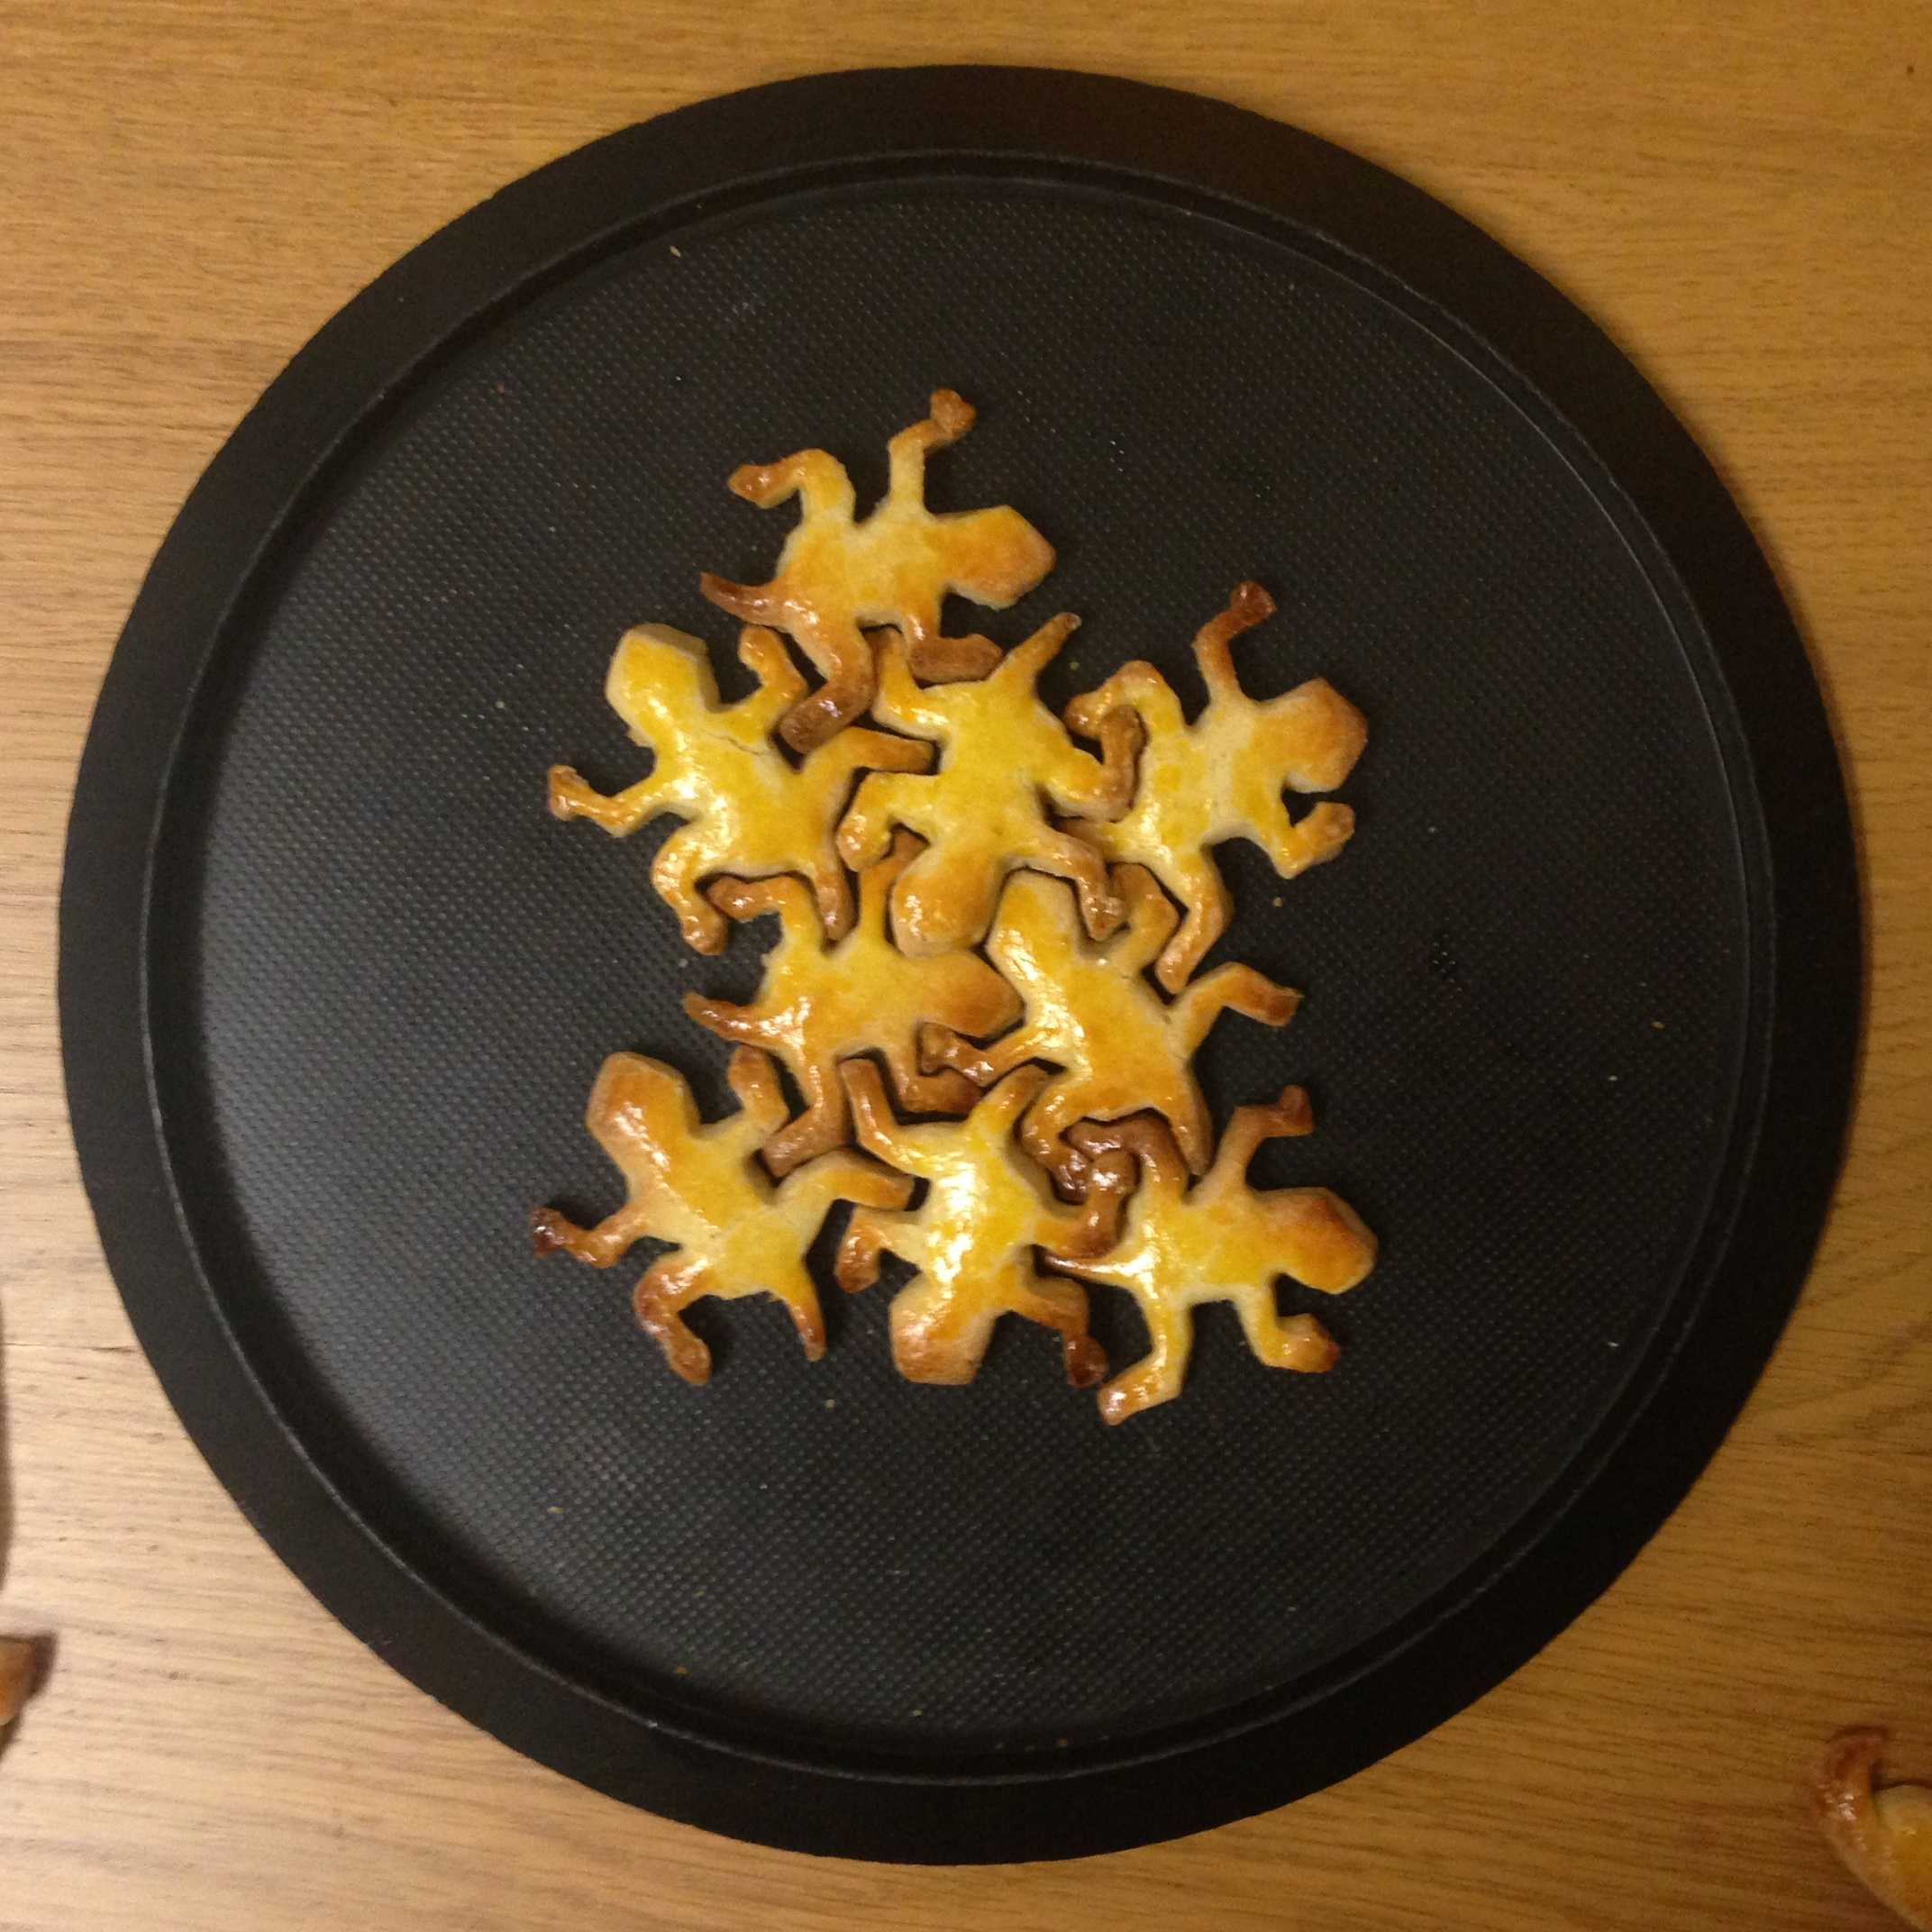
- The tapered blade works very well, cutting through the dough easily.
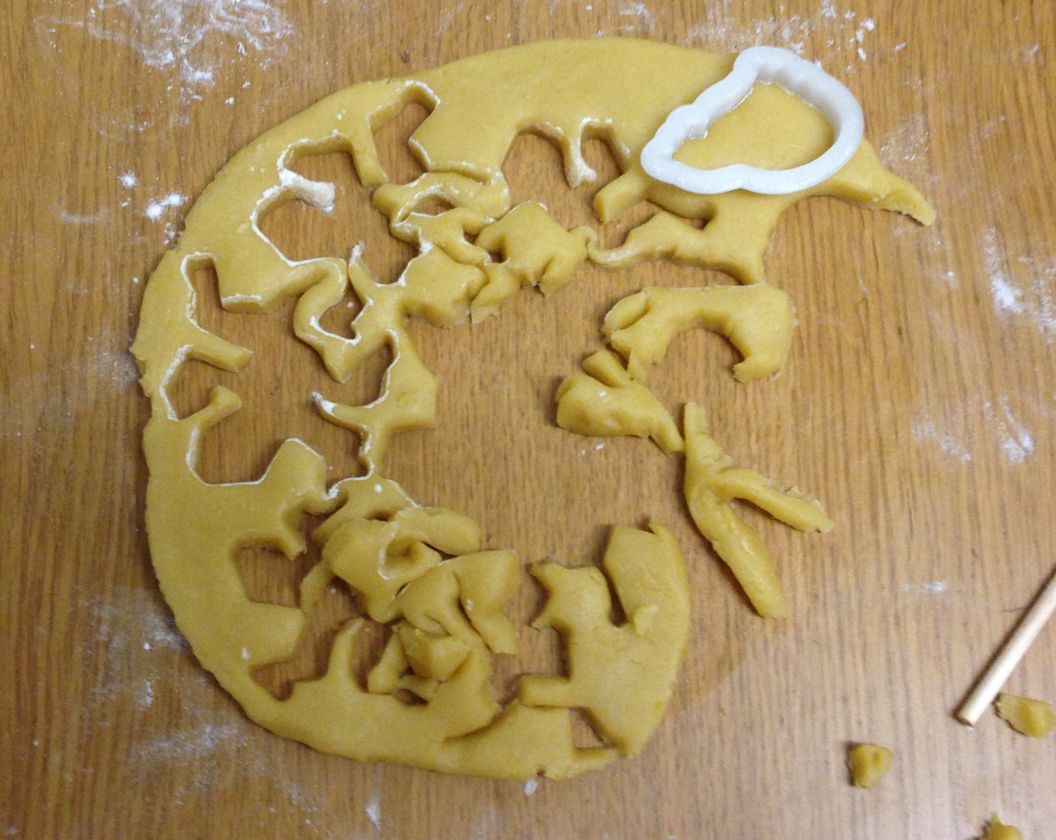
- Thin features such as lizard legs, thinner than about the thickness of the dough (6–7 mm), are very hard to get out of the cookie cutter. Pushing with a wooden stick or a moistened cotton swab helps, but leaves visible dents in the cookie. A possible solution might be to print an additional stamp in the shape of the cookie that can be used to push the whole cookie out at once, but I have not tried this yet.
- Other than that, the dough separates easily from the plastic, the roughness of the layer structure appears to be no problem.
- Cleaning the cookie cutters with hot water and dishwashing detergent appears to cause no damage to the PLA (I didn’t try putting them in the dishwasher as I don’t have one).
Files
Example files for the Inkscape/Blender workflow
Binaries of the Cookie Cutter Sweeper and example files